
Building a DIY campervan electrical system can be one of the most challenging yet rewarding aspects of a self-build. Getting the cable sizing right is crucial—not just for the system’s efficiency but also for its safety. Undersized cables can overheat and pose a fire risk, while oversized cables might add unnecessary weight and cost. This guide will walk you through the essentials of cable sizing for your campervan’s electrical setup. For a beginner’s guide to camper electrical systems click here.
Why Cable Sizing Matters
Cables are the lifeblood of your campervan’s electrical system. They transport power from your battery to devices like lights, appliances, and plug sockets. Correct cable sizing is critical because:
- Avoid Voltage Drop: Voltage drop occurs when the cable is too long or thin for the current it carries, reducing the power that reaches your devices.
- Prevent Overheating: Cables with insufficient cross-sectional area (CSA) will heat up, potentially leading to damage or fire.
- Ensure Safety: Proper cable sizing ensures that your electrical system complies with safety standards and minimizes risks.
Factors to Consider When Sizing Cables
There are three main factors to consider when determining the correct cable size:
- Current (Amps):
- The current, measured in amperes (A), is the amount of electricity flowing through the cable. Every appliance or device in your system will have a rated current, which determines the load on the cable.
- Example: A 12V fridge may draw 5 amps, while a water pump might draw 10 amps.
- Voltage (Volts):
- Most campervans run on a 12V or 24V system. The lower the voltage, the higher the current required to deliver the same power. This means voltage drop becomes more critical in a 12V system.
- Cable Length:
- Cable length is the total distance from the battery to the appliance and back (the round-trip length). Longer cables increase resistance and require larger sizes to avoid voltage drop.
- Acceptable Voltage Drop:
- For most 12V systems, a voltage drop of 3% or less is recommended for sensitive equipment like fridges and lights. For less critical devices, a drop of up to 5% may be acceptable.
Cable Sizing Formula
To calculate the required cable size, use the following formula for voltage drop:
Cable Size (mm²) = (2 × Current × Length × Resistance) ÷ Voltage Drop
- 2 accounts for the round-trip (positive and negative cables).
- Resistance is the cable material’s resistance per meter (consult a cable resistance chart for copper cables).
- Voltage Drop is the acceptable percentage drop multiplied by your system voltage (e.g., 0.03 × 12V = 0.36V for a 3% drop).
Common Campervan Electrical Loads and Example Sizing
Below is a general guide to cable sizing based on typical campervan loads in a 12V system.
| Device | Current (Amps) | Cable Length (m) | Cable Size (mm²) | Notes |
|---|---|---|---|---|
| LED Lights | 2A | 5m | 1.5mm² | Thin cables are sufficient for low loads. |
| Fridge (Compressor) | 5A | 10m | 4mm² | Critical device – minimize voltage drop. |
| Water Pump | 10A | 8m | 6mm² | Short bursts of high current. |
| Inverter (1000W) | 83A | 2m | 25mm² | High current – use thick, heat-resistant cables. |
| Solar Panel to MPPT | 15A | 5m | 6mm² | Ensure UV-resistant cable for external use. |
Practical Steps for Cable Sizing
- List All Devices:
- Start by listing every device you plan to power. Include lights, fridges, inverters, fans, water pumps, USB outlets, and other appliances.
- Determine Current Draw:
- Look at each device’s manual to find its current rating (in amps). If it’s listed in watts, use the formula:
Current (A) = Power (W) ÷ Voltage (V).
- Look at each device’s manual to find its current rating (in amps). If it’s listed in watts, use the formula:
- Measure Cable Lengths:
- Measure the distance from the battery to the device, then multiply by 2 for the round-trip length.
- Calculate Voltage Drop:
- Decide your acceptable voltage drop (3-5%) and calculate the required cable size using the formula above. Alternatively, use an online DC cable size calculator for quicker results.
- Choose the Right Cable:
- Once you know the required cross-sectional area (CSA), select a cable with the same or greater CSA. Always choose high-quality, flexible copper cables designed for automotive use.
Types of Cables for Campervan Systems
When purchasing cables, ensure they are suitable for automotive and marine environments:
- Single-Core Automotive Cable: Ideal for most 12V appliances.
- Twin-Core Sheathed Cable: Best for running cables through walls or concealed areas.
- Battery Cable: Thick, durable cable designed for high-current applications like inverters or battery connections.
- Solar Cable: UV-resistant and durable for external solar panel connections.
Protecting Your Wiring
Proper cable sizing is just one part of a safe and functional campervan electrical system. You must also:
- Use Fuses or Circuit Breakers:
- Protect each circuit with a fuse or breaker rated slightly above the device’s maximum current draw.
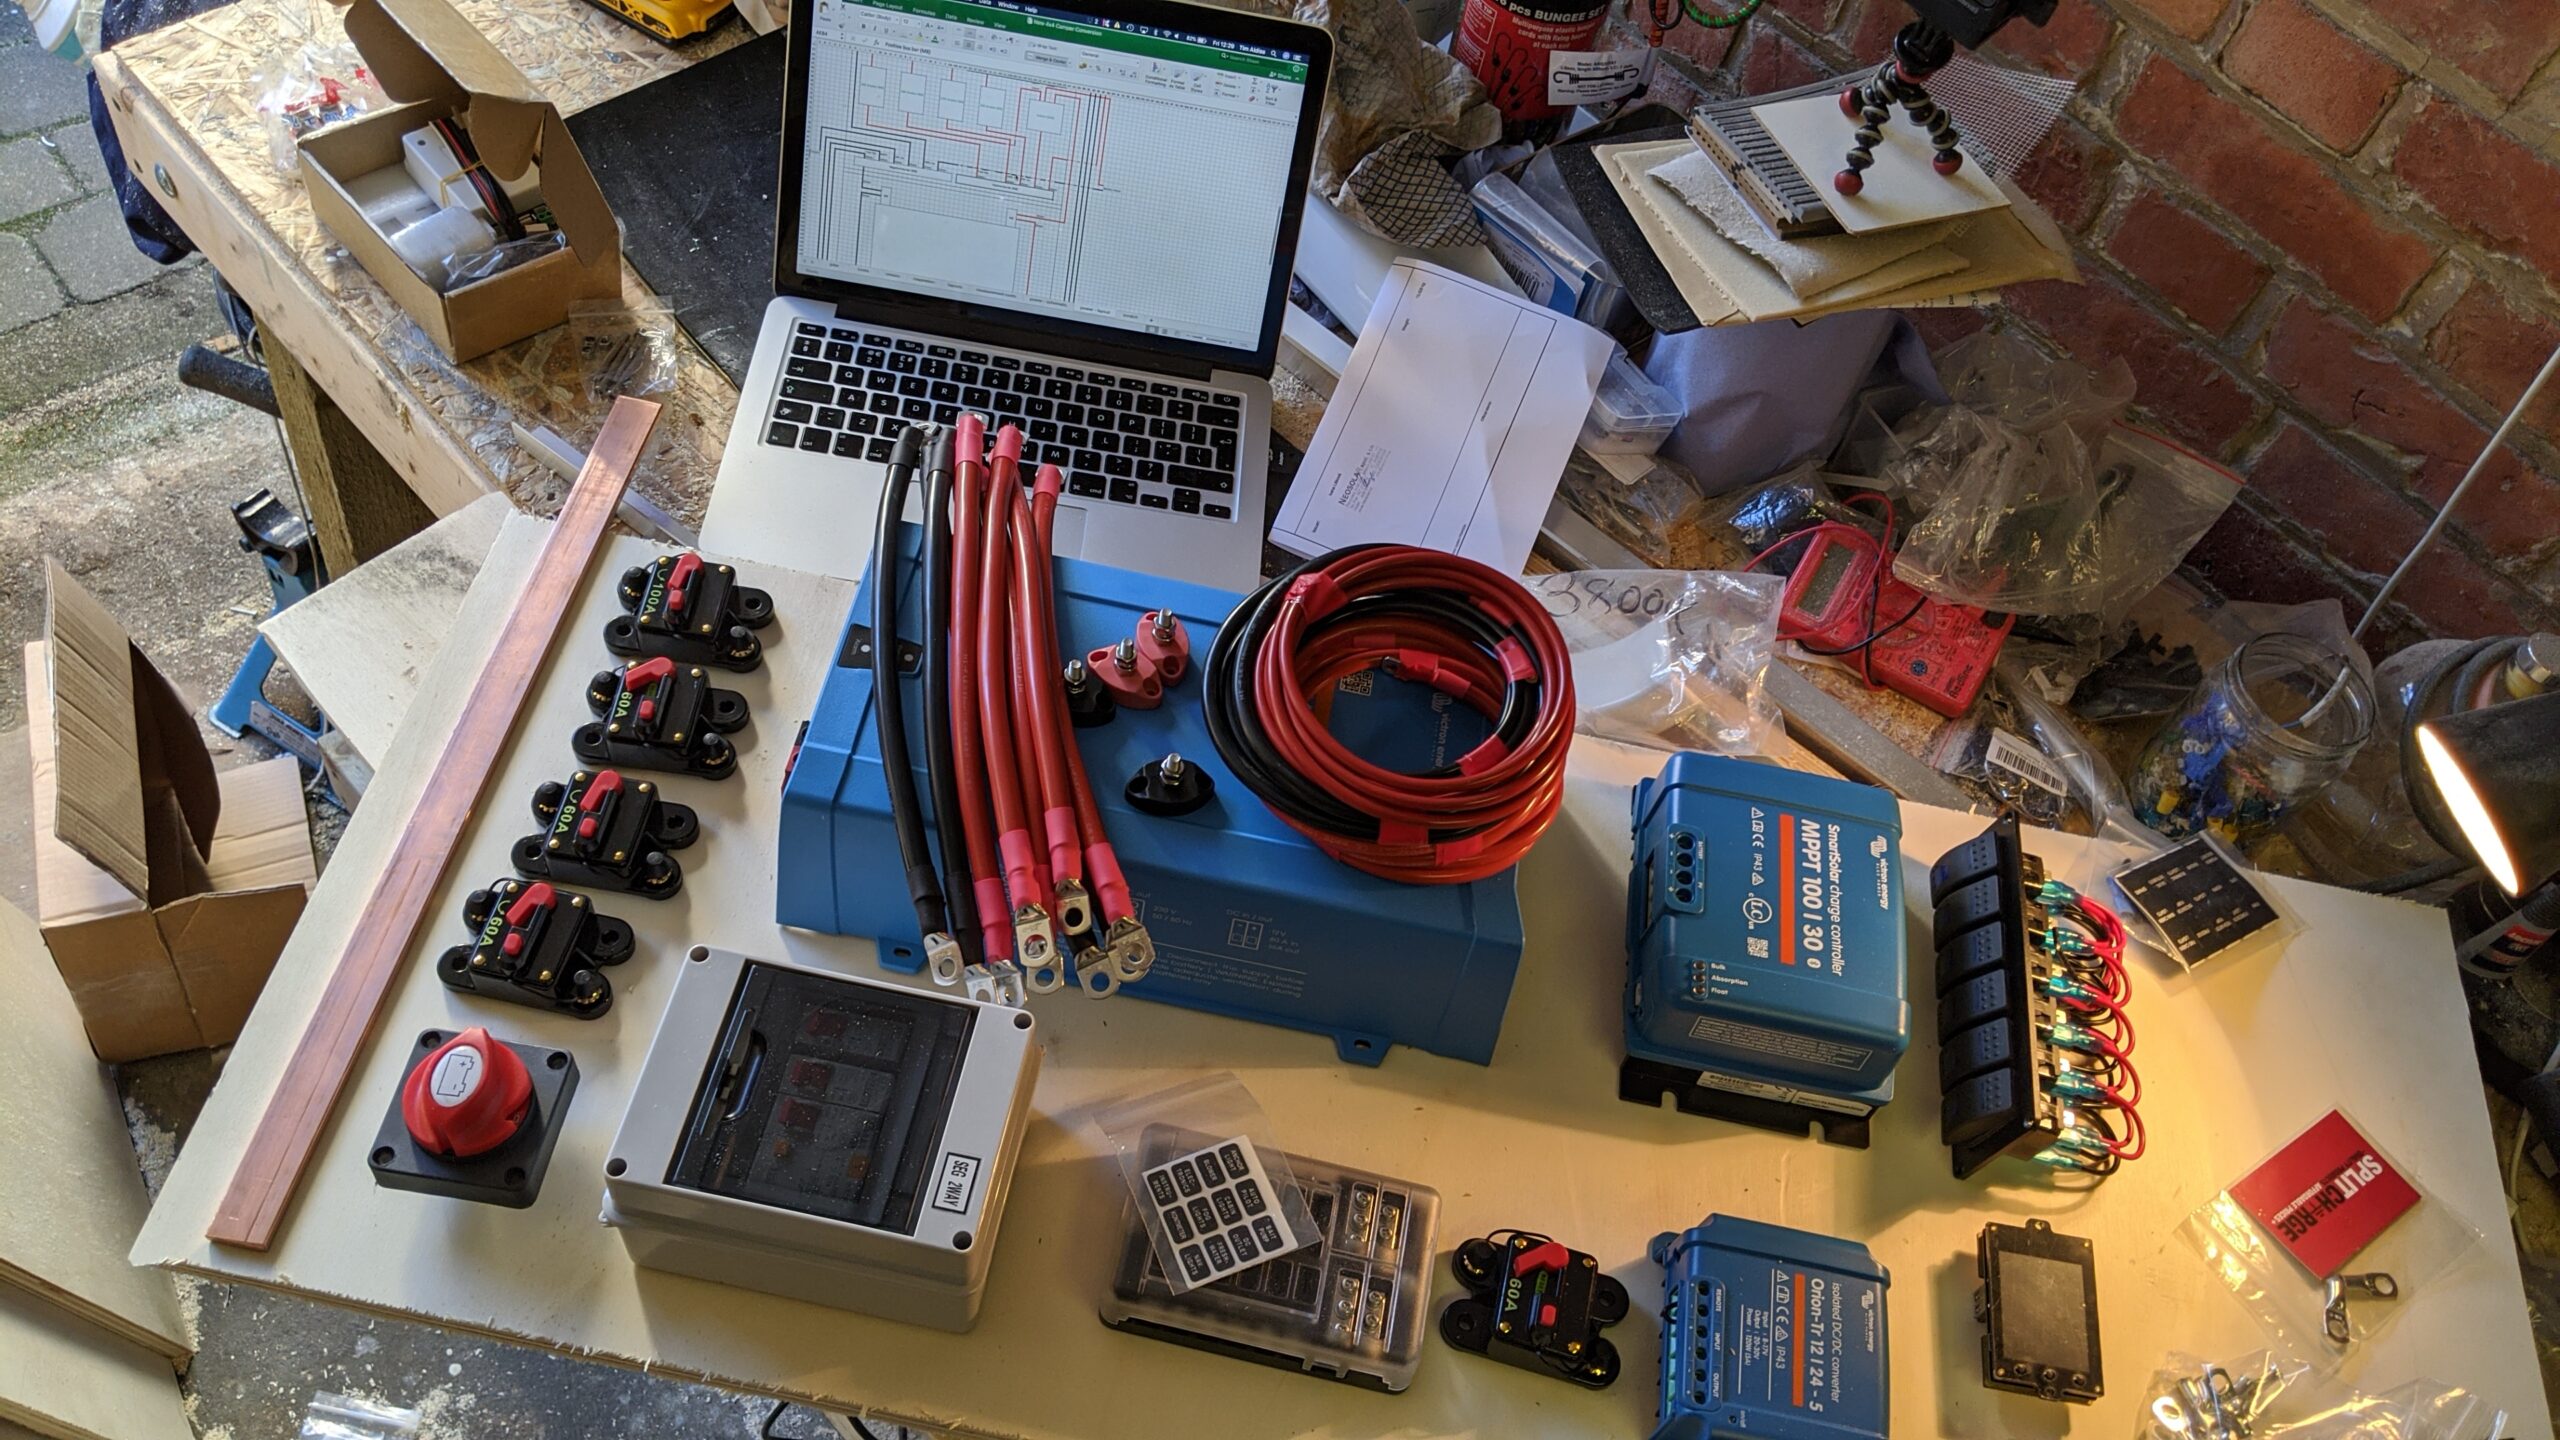
- Install a Busbar:
- Use busbars or distribution blocks to manage multiple connections efficiently and reduce cable clutter (Note the copper bar in the left of the first photo here)
- Cable Management:
- Use conduit, cable ties, and grommets to prevent abrasion and ensure neat routing of cables.
- Test the System:
- After installation, test each circuit for voltage drop and ensure everything works as expected.
Quick Reference: Cable Sizes for 12V Systems
| Current (A) | Length (m) | Cable Size (mm²) |
|---|---|---|
| 10A | 5m | 4mm² |
| 20A | 5m | 6mm² |
| 50A | 3m | 16mm² |
| 100A | 2m | 25mm² |
Cable Cutting and Lug Crimping for Your Campervan Electrical System
Properly cutting cables and crimping lugs is a critical part of building a safe and reliable campervan electrical system. Poorly done connections can lead to voltage drop, overheating, or even system failure. Here’s a quick guide to get it right:
Cable Cutting
- Choose the Right Tools:
- Use heavy-duty cable cutters designed for automotive or marine cables. These cutters provide a clean cut without fraying the copper strands.
- Avoid using general-purpose scissors or pliers as they can damage the cable or result in uneven cuts.
- Measure Twice, Cut Once:
- Measure the exact length of cable needed for the connection, accounting for routing and any slack for future adjustments.
- Cut Cleanly:
- Ensure the cut is clean and square to expose the copper strands evenly. A clean cut ensures a better connection with the lug.
Lug Crimping
- Choose the Right Lugs:
- Select cable lugs or terminals that match the cable size (mm²) and the bolt size of the connection point. For example, a 16mm² cable requires a 16mm² lug.
- Use tinned copper lugs for corrosion resistance, especially in damp campervan environments.
- Strip the Cable Insulation:
- Use a cable stripper or a sharp blade to carefully remove the insulation without cutting into the copper strands.
- Strip enough insulation to fit the exposed copper fully into the lug (usually about 10-15mm, depending on the lug size).
- Insert the Cable into the Lug:
- Push the exposed copper strands into the lug until they are fully seated. Ensure no stray strands are left outside the lug.
- Crimp the Lug:
- Use a hydraulic crimper or heavy-duty manual crimping tool designed for the lug size.
- Place the lug in the crimper’s die, ensuring it’s positioned correctly.
- Squeeze firmly until the lug is securely crimped. A properly crimped lug will have a tight fit with no movement of the cable inside.
- Add Heat Shrink Tubing:
- Slide a piece of heat shrink tubing over the lug and cable joint before crimping, if you plan to use it.
- After crimping, position the tubing over the connection and use a heat gun to shrink it. This provides insulation and protects against moisture.
Tips for Success
- Always double-check your connections to ensure they are secure and free from damage.
- If you don’t have a crimper, consider renting or borrowing one, as it’s an essential tool for larger cables. However it’s also worth stating that you can order cables cut to length and with the correct crimps on them easily and cheaply online now.
- For small-gauge cables, consider using insulated crimp terminals and a ratcheting crimping tool for precision.
By cutting cables cleanly and crimping lugs correctly, you’ll create strong, reliable connections that maximize the efficiency and safety of your campervan electrical system.
Conclusion
Getting the cable sizing right for your DIY campervan electrical system ensures that your devices operate efficiently and safely. Always prioritize quality cables and follow the guidelines for voltage drop and current load. When in doubt, consult a professional or use an online calculator to double-check your calculations.
Happy building, and enjoy your campervan adventures!


Recent Comments